20130414

a mini tutorial - before&after of a british short hair

i really enjoyed taking photos of this fellow. i love british short hair anyway. for sometime i've been trying to capture a cool pose of this feline and i think i got one.

post-production of this photo was really fun and not really complicated. as you can see on screenshots, steps are really simple. hopefully it may be an inspiration to you.

raw shot itself is not really fancy, plus it's kinda under-exposed.

final result is this.


god knows what she was up to. but that short moment of thinking, gave me a chance of taking this shot.


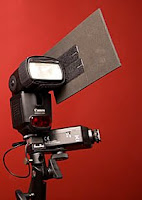
equipment&settings, nikon d700 + nikon 105 f/2.8 Macro + nikon sb700.
f/3, 1/100 sec, manual exposing, flash bounced through ceiling. whitebalance auto, iso 200.


- after some cropping, main step was masking eyes and nose.


-after selecting right areas, used invert selection so we can modify the rest. reduced the saturation of rest for around -64, and reduced the saturation of whole photo for around -15.


after this step all you need to to is paint the chair leg off with the brush of color i used, which was grey-ish. and some vignette-ing to the right side.


thats pretty much all actually. thanks to nikon 105 macro prime lens, raw shot itself was sharp enough.

well the point is; as i always say, you can boost your shots with some post production eventhough they might look dull at first.

have fun.

20130402

incense-smoke photography tutorial

tutorial.. well, at least thats what it looks like to me..

once upon a time, i came up with the photo below. i wasn't really into smoke, incense type of photography
but as i find myself, secretly searching for these kind of shots and also trying to learn how to take them..
i thought to myself, well might as well give it a try.


so im gonna share the story behind this photo,
hopefully you'll be taking similar or better shots.


stuff you'll be needing;

- an external flash ( i should add, its a must)
- a black background (so smoke can pop in the shot) 
preferably something can absorb the light
- a reflector like a piece of white paper to the otherside so it can reflect the light from flash (this is actually up to you. not mandatory)
- incense and its thingy
- and a piece of paper to block the light reaching to the background, should look like this:


there will be some annoying minor problems but im sure you'll sort them as you go.


---

my setup was somewhat like this


and theres the external flash on the left with a blocker as i mentioned.

it should look like this once you're done with the setup


well this was my final shot.
take like hundreds of shots and pick the one you like. 
since you won't be able to control its form, you will need some luck aswell to capture the shape you want.

use negative effect on photoshop if you like to get the white background i used.

mine got some coloring and retouch too, nothing else really.


thats pretty much all.
have fun!